Android中View的绘制流程,始于ViewRootImpl#performTraversals,而ViewRootImpl是怎么和DecorView相关联起来的呢?
带着这样的疑问,于是对Activity两个关键方法onCreate和onResume方法的流程调度进行分析,得出Activity中PhoneWindow,以及DecorView、ViewRootImpl创建过程,最终解答了上面的疑问!
流程总结
Activity从创建到显示的过程,分为以下几步:
- 从
ActivityThread#handleLaunchActivity开始,该方法又会调用到ActivityThread#performLaunchActivity真正创建Activity并开始启动工作。 ActivityThread#performLaunchActivity的工作分为三步: 首先调用Instrumentation#newActivity来创建出一个Activity实例,在该方法实际上是通过反射来创建的Activity的实例对象;之后调用Activity实例对象的activity#attach,该方法实例化了mWindow字段,它是一个PhoneWindow对象,后面通过该对象来管理Activity页面中的视图;最后调用Instrumentation#callActivityOnCreate,该方法最终调用activity#onCreate方法,也就是生命周期方法onCreate。onCreate方法中调用setContentView,该方法调用到PhoneWindow#setContentView创建一个DecorView,它是每个Activity的页面的根布局,注意此时该View还并未添加到Window窗口中。ActivityThread#handleResumeActivity,先调用activity#onResume方法,也就是生命周期方法onResume,之后通过WindowManagerImpl#addView(decorView)将前面创建的DecorView添加到Window中,此时,我们就能真正看到View了。
创建Activity
ActivityThread.java
|
|
Activity.java
|
|
设置ContentView
在onCreate中调用setContentView(),设置Window将要显示的内容。Activity#setContentView实际上最终调用到的是PhoneWindow#setContentView,该方法中会初始化DecorView mDecor,它是Activity页面的rootView,它继承自FrameLayout。创建好了DecorView后,再根据layoutResourceId,将xml解析成View添加到DecorView中。
installDecor -> generateLayout -> mDecor.onResourcesLoaded。
PhoneWindow.java
|
|
Window.java
|
|
DecorView.java
|
|
Activity页面可见onResume
ActivityThread#handleResumeActivity方法,将前面创建的DecorView添加到Window中,这样我们才能看到Activity的页面内容。
在WindowManagerGlobal#addView中,会创建ViewRootImpl对象,并且让他和DecorView相关联。
ActivityThread.java
|
|
WindowManagerImpl.java
|
|
ViewRootImpl.java
|
|
View.java
|
|
流程图
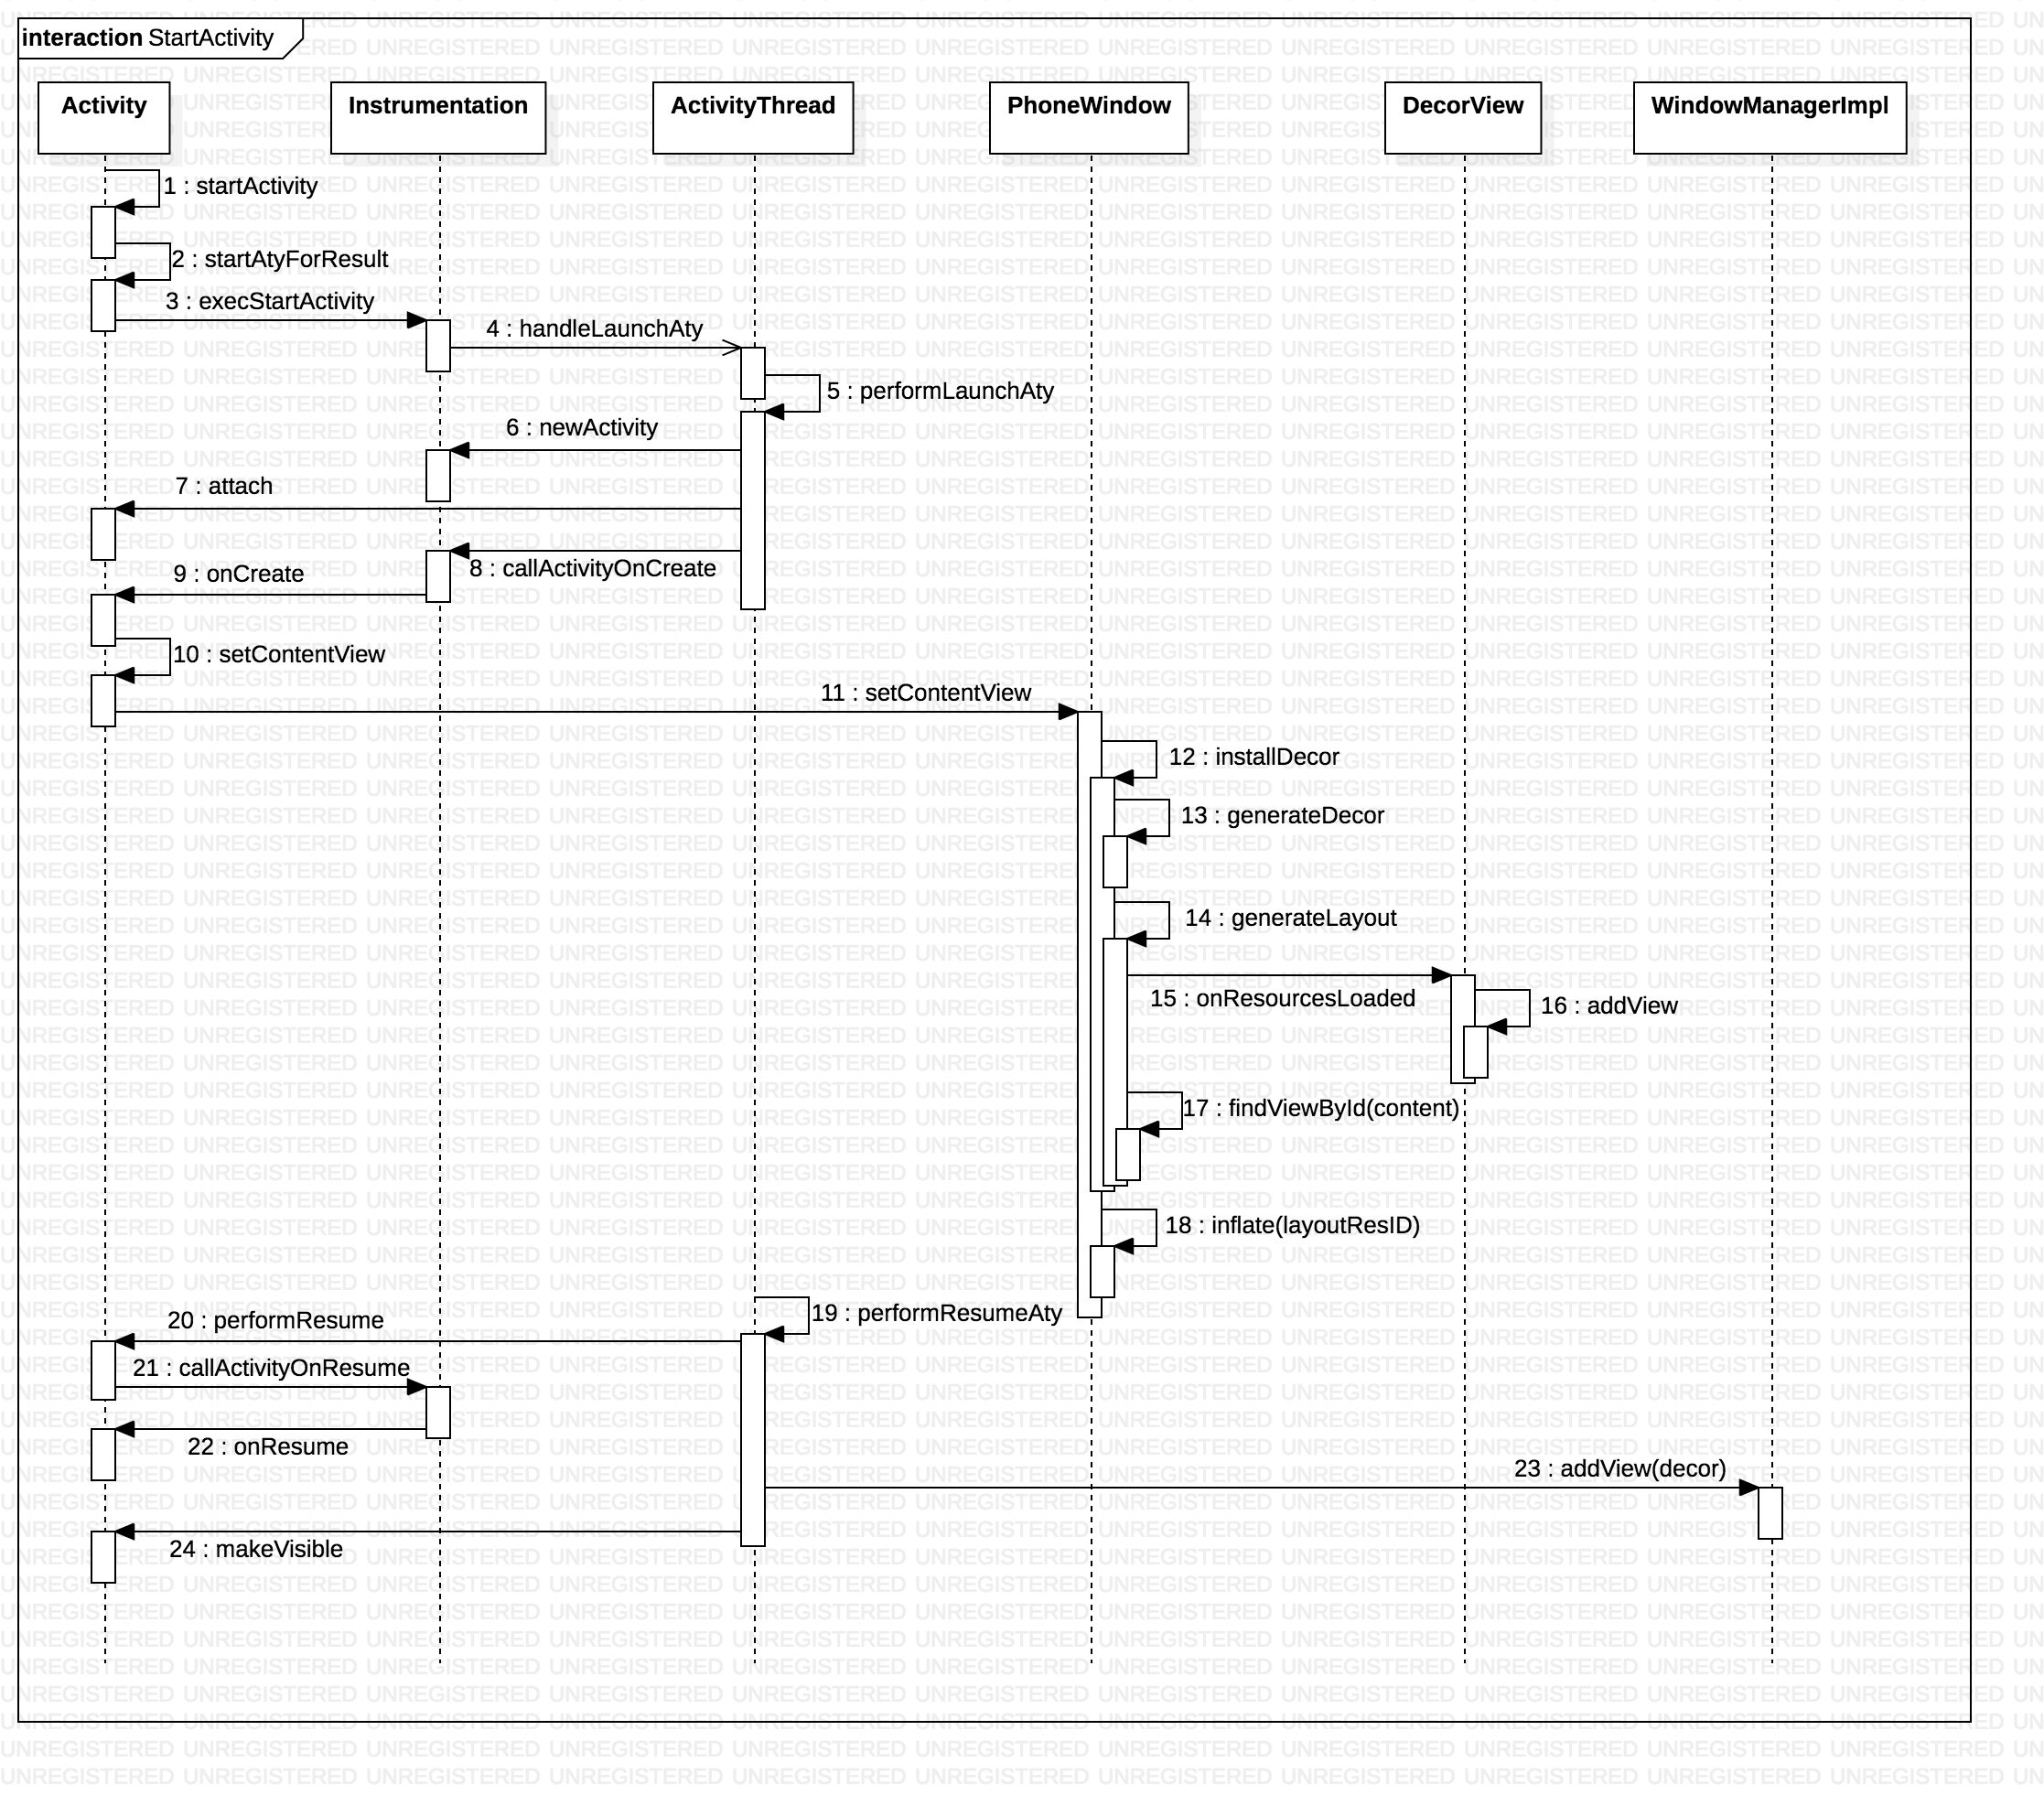
上图中,
step3和step4在真实情况下,并不是这样直接调用过去了,而是Instrumentation#execStartActivity方法,会最终调用到ActivityManagerService,AMS在创建好启动Activity所需要的相关环境后,会调用ApplicaitonThread#scheduleLaunchActivity,该方法才调用到ActivityThread#handleLaunchActivity。